Get 20% off orders over £50 with discount code REWIND
 01423 319041

What do you want to convert?
Back to Blogs
How to Connect a VHS Player to a TV
Sean Parle • 26 June 2025
So you’ve found a box of old tapes in the attic. Family holidays. Birthday parties. Maybe a bit of Gladiators recorded off ITV. But there’s a problem: the VHS player is gathering dust, and your new flat-screen telly doesn’t even have the right holes in the back.
You're not alone. As TVs have modernised, old connectors have vanished. SCART sockets are long gone. Yellow, red, and white AV ports are becoming rare. And most people haven’t touched a coaxial aerial lead since the early 2000s.
The good news? You can still connect a VHS player to pretty much any television with the right know-how. Whether you’ve got a chunky old CRT or a sleek OLED with nothing but HDMI ports, there’s a solution.
This guide walks you through all the connection methods, what cables and converters to buy, and how to get your tapes playing again in minutes. No tech jargon. No guesswork. Just everything you need to see those memories flicker back to life on screen.
What You’ll Need Before You Start
Before you go plugging cables into random sockets, it helps to know exactly what you’re working with. VHS players are simple, but TVs… not so much these days.
Here’s what you need to get started:
A VHS Player (VCR)
Any standard VHS player will do - Panasonic, JVC, Sony, etc. Make sure it powers on and accepts tapes. If it chews them up or spits them out, stop right there.
A Television (Old or New)
The type of TV you’ve got determines what kind of connection you’ll use.
Older TVs (typically pre-2010) usually have SCART, RCA (yellow/red/white), or even RF coaxial ports.
Newer TVs might only have HDMI - and nothing else.
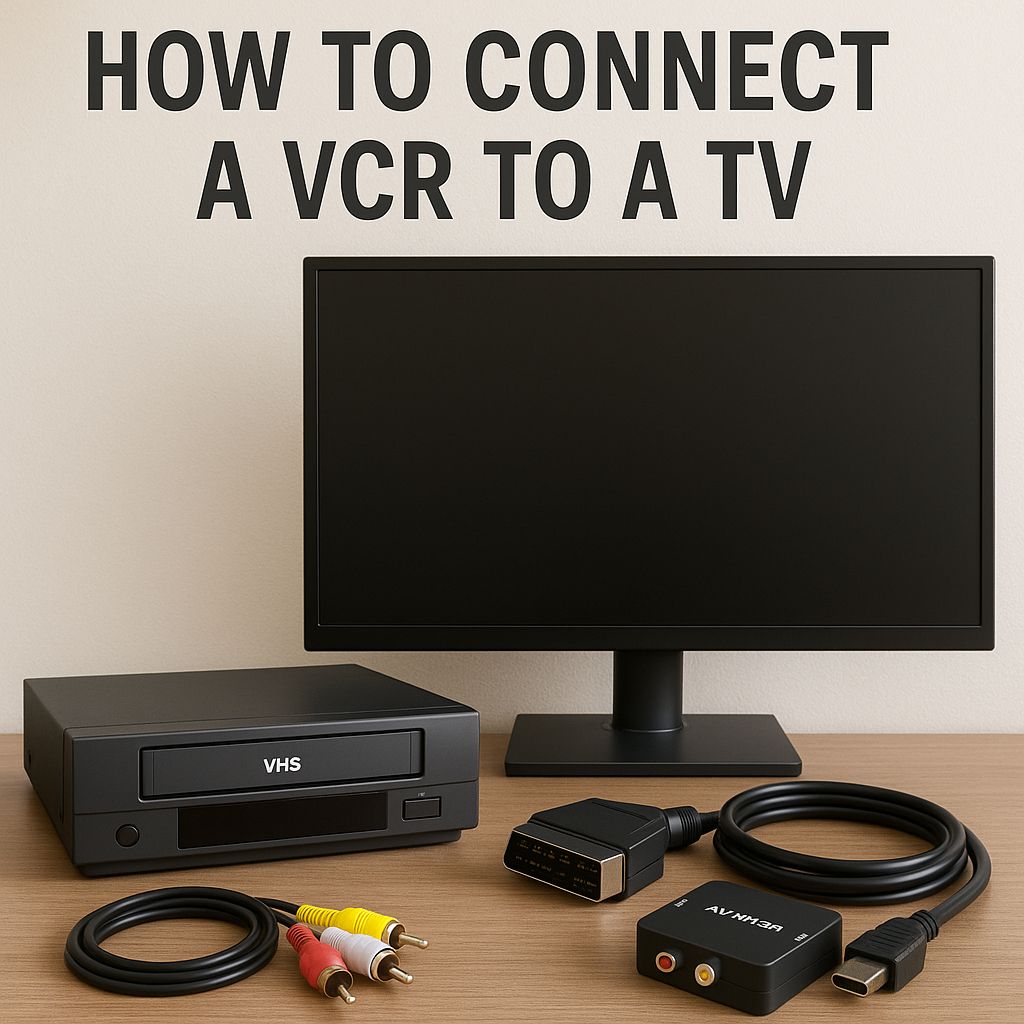
The Right Cables
Depending on your setup, you’ll need one of the following:
RCA Composite Cables (yellow for video, red/white for audio)
SCART Cable (mainly in the UK and Europe)
RF Coaxial Cable (old school, round screw-in style)
Composite-to-HDMI Converter (if your TV only has HDMI ports)
Optional but Helpful: A Test Tape
Don’t risk a cherished home video on your first try. Use something disposable to test your setup in case the VCR is faulty.
*Top Tip* Send your VHS tapes to us and have them digitised and returned to you within a week - and then it doesn’t matter if your dodgy VCR eats your original tapes!
Power and Remote Controls
Make sure both devices have power leads and, ideally, their original remotes. Some TV input settings are only accessible via remote.
With that lot in hand, you're ready to get connected. Next up: how to hook things up if your TV still has the old ports.
Connecting to an Old TV (with SCART, RCA, or RF Inputs)
If your telly's got a few chunky sockets round the back, you’re in luck. Connecting a VHS player to an older TV is usually quick, cheap, and doesn’t require any fancy converters.
Option 1: RCA Composite Cables (Yellow, Red, White)
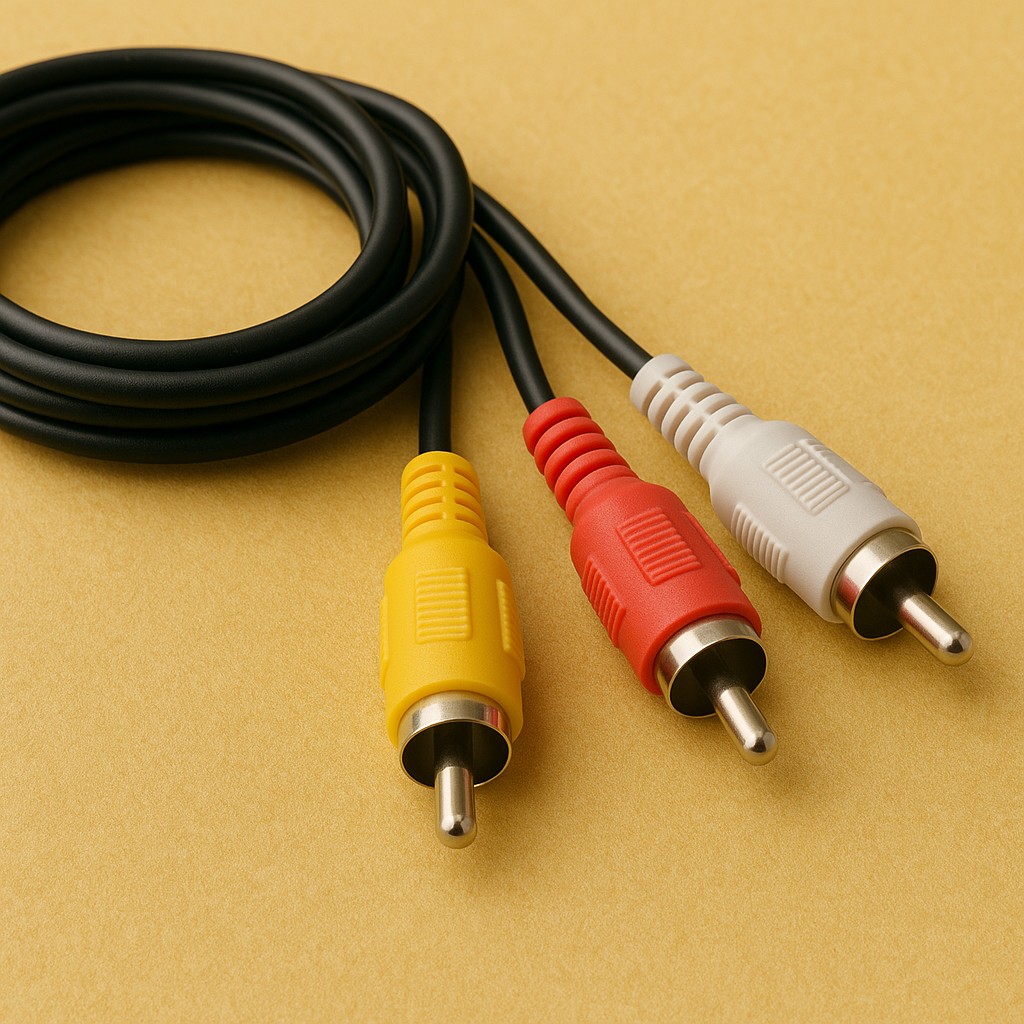
This is the most common method - and usually the best quality you’ll get from VHS. Most of the time you can get away with pretty cheapo Amazon ones, but if you experience a wavy picture, this may be due to interference due to the cables not being shielded enough. In that case, you may need better quality ones.
How to connect:
Plug the yellow cable from the VCR’s video out to the TV’s yellow video in.
Do the same with red and white for audio (right and left channels).
Switch your TV to the correct AV input (sometimes labelled AV1, Video, or EXT).
Press play on the tape.
Tip: If your TV has multiple AV inputs, try each one until the picture appears. Some TVs require manual input selection from a menu.
Option 2: SCART Cable (Europe only)
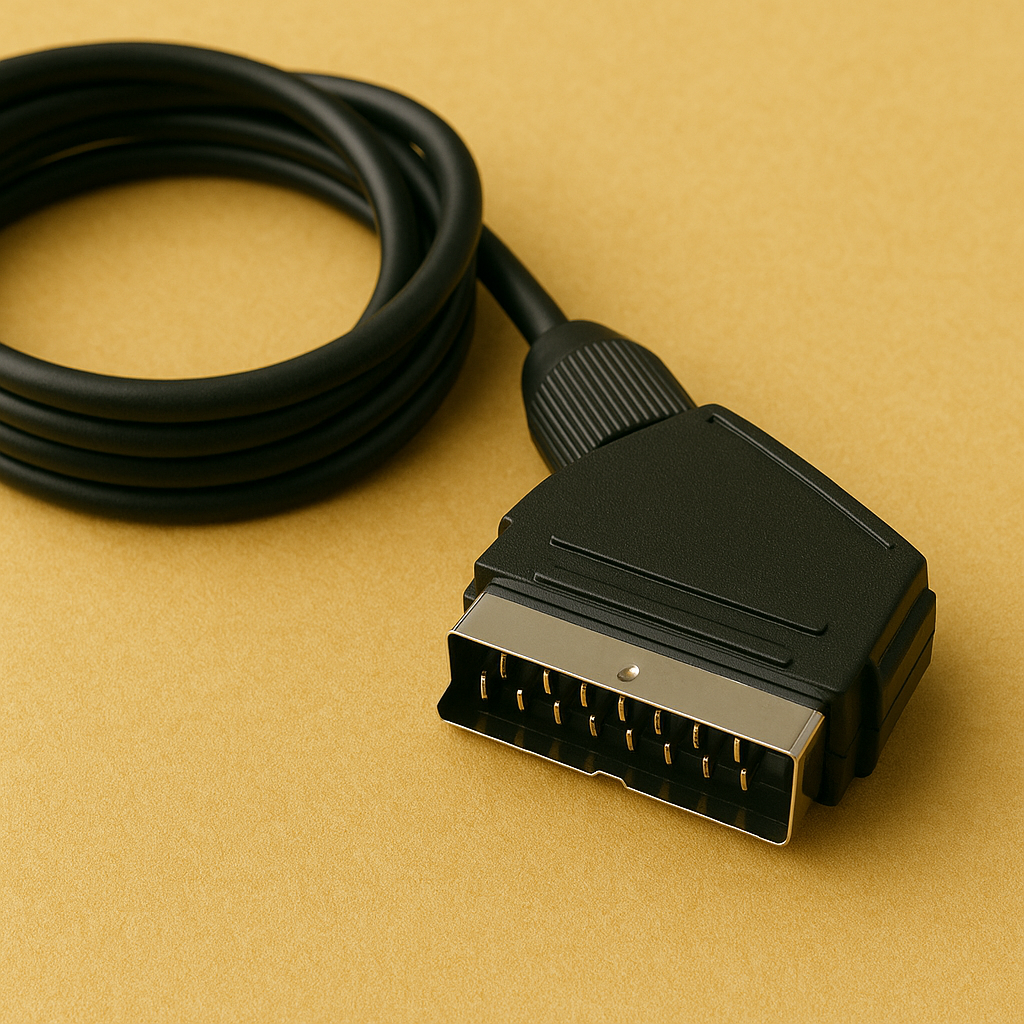
SCART cables carry both video and stereo audio through a single chunky 21-pin plug. If you’re in the UK or EU and both devices have a SCART socket, this is an easy win.
How to connect:
Plug the SCART cable into the back of your VCR and into the SCART socket on your TV.
Select the AV channel on your TV (usually AV1 or AV2).
Hit play and you’re sorted.
Warning: SCART sockets are directional. If you use a SCART-to-RCA adapter, make sure it’s the right way round (VCR output → TV input).
Option 3: RF Coaxial Cable (Last Resort)
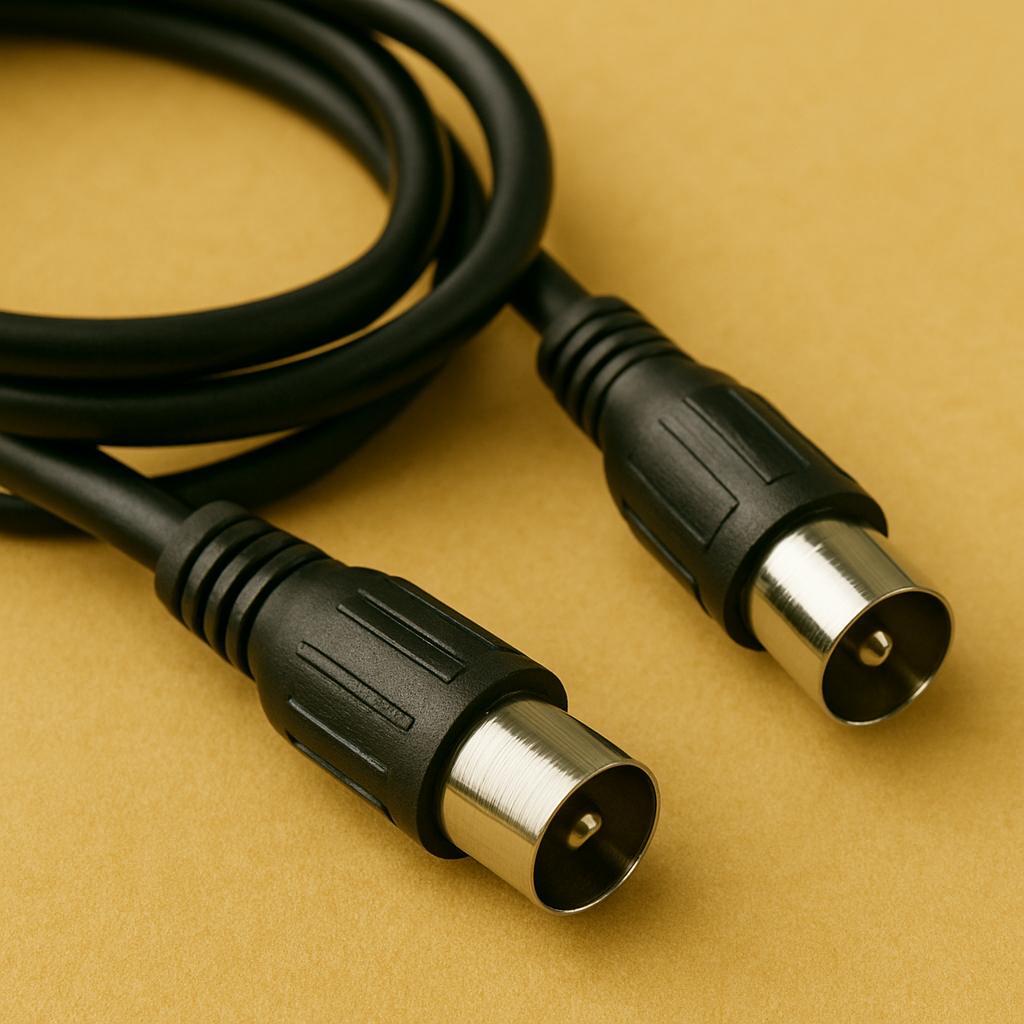
If your TV only has an aerial input and your VCR doesn’t support AV or SCART, you can still use an RF coaxial cable. The picture quality is poor, and audio is mono - but it works.
How to connect:
Connect the coaxial cable from the ‘RF OUT’ on the VCR to the TV’s aerial input.
Set the TV to analogue tuning mode and search for the VCR signal.
Once it finds the channel, save it as a preset.
Note: You may need to switch the VCR to "CH3" or "CH4" output, depending on the model.
If your TV has any of these ports, you’re golden. But what if it’s a newer model with none of them? Then it’s time to bring in the cavalry…
Connecting to a Modern TV (HDMI-Only, No AV Inputs)
Modern TVs are sharper, slimmer - and far less cooperative when it comes to old kit. If your telly only has HDMI ports, you can’t just plug in a VHS player directly. But don’t panic. All you need is a cheap adapter or a converter and the right cables.
Option 1: RCA to HDMI Converter
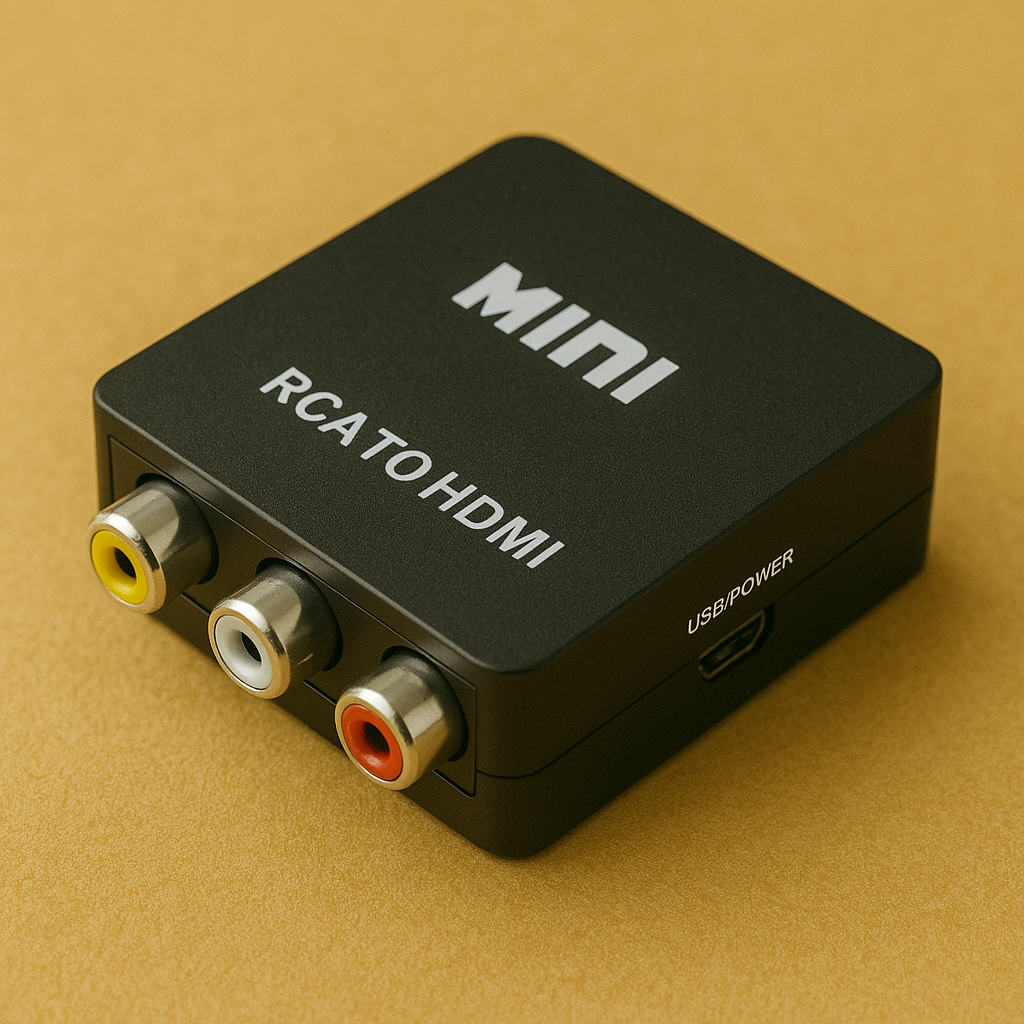
This is the most common and reliable solution. It takes the analogue output from your VCR and turns it into a digital HDMI signal that your TV can read.
What you’ll need:
A set of RCA cables (yellow/red/white)
An RCA to HDMI converter box
A spare HDMI cable
Power for the converter (usually via USB)
How to connect:
Plug the RCA cables from the VCR into the input side of the converter (match the colours of the plugs with the sockets on the converter).
Connect an HDMI cable from the converter’s output to the TV’s HDMI port.
Power the converter via USB (some models include a mains plug; others just need a USB socket). Modern TVs usually have a USB socket you can use for this.
Switch your TV to the correct HDMI input.
Press play on the VCR, and you should see your video playing.
Heads up:
Make sure you buy a converter, not a passive adapter. Adapters don’t process the signal and won’t work.
Some converters let you switch between 720p and 1080p output. Try both - VHS quality won’t change, but it might fit your screen better.
Option 2: SCART to HDMI Converter (If Your VCR Only Has SCART)
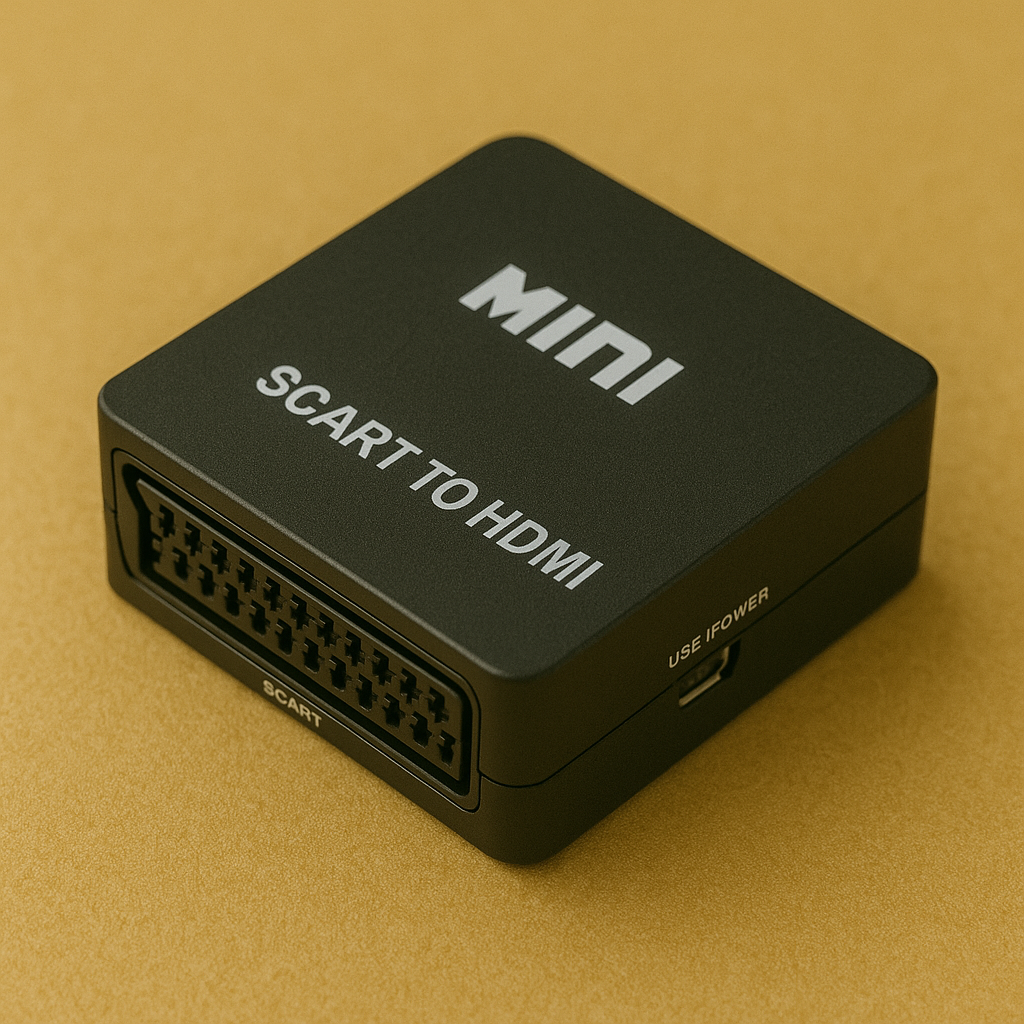
Some VHS players, especially in the UK and Europe, only have a SCART output. In that case, you’ll need a SCART to HDMI converter.
Same rules apply:
It needs to be powered.
It needs to be a converter not a directional adapter.
Plug SCART from the VCR to the converter, then HDMI into the TV.
Switch your TV to the HDMI input and you’re good to go.
A Note on Upscaling
These converters won’t magically make your old tapes look HD. In fact, the picture might look a bit rough on a giant modern LCD screen, as firstly you’ll be seeing it on a much bigger screen than it was intended for, and secondly, old CRT TVs interlace the picture which actually helps make the image a little less pixelated to the human eye, but LCD TVs obviously do not. But for most people, it’s good enough to enjoy the nostalgia without a headache.
Once connected, the next question is: what if the screen stays black? Let’s troubleshoot that next.
What to Do If You See No Picture
You’ve connected everything, hit play on the tape, and… nothing. Black screen. No sound. Maybe a flicker, maybe not even that. Don’t chuck the VCR out the window just yet - here’s a checklist to get things working.
1. Check the TV Input
This is the most common culprit. TVs have multiple input sources (HDMI 1, HDMI 2, AV, etc.) and often sit on the wrong one by default.
Use your remote to cycle through the input or source options.
If you’re using a converter, make sure you’ve selected the HDMI input that matches the port you used.
If you’re using AV or SCART, look for AV1, AV2, Video, or EXT.
2. Make Sure the VHS Player Is Actually Playing
Yes, obvious - but easy to miss.
Look for the counter moving or a play symbol on the VCR display.
Listen for the sound of the tape running.
Try a different tape in case the one you're using is blank or damaged.
3. Double Check Your Connections
Loose cables = no signal. Check every connection is fully inserted and matched up.
Yellow to yellow, red to red, white to white.
If using a SCART adapter, make sure it’s in the right way round (some are input-only or output-only).
If using a converter box, confirm it’s powered and switched on.
4. Try Another HDMI Port or AV Input
Sometimes the port itself is flaky.
Switch to another HDMI port on the TV and adjust the input setting accordingly.
If you’re using AV or SCART, try a different input label on the TV menu.
5. Power Cycle Everything
Turn it all off. Then turn it back on again.
Power off the TV, the VCR, and the converter (if using one).
Unplug them for 30 seconds.
Plug back in and power on, starting with the VCR, then the converter, then the TV.
6. Test with a Different Tape
The tape itself might be blank, worn out, or recorded in a different format.
Try a known good tape that’s worked in the past.
If the tape is from another country (e.g. NTSC vs PAL), it may not play properly on your equipment.
If you’ve worked through all of that and still no signal, it might be a faulty cable, a dead VCR, or a dodgy converter box. Fortunately, replacements for all three are cheap and widely available. Still got a picture but it looks awful? We can sort that!
Common Problems and How to Fix Them
Even if you get a picture, it might look like a glitchy mess. VHS isn’t known for crisp visuals, but there are limits. Here are the usual suspects - and what you can do about them.
Black and White Picture
This usually points to a format mismatch.
PAL vs NTSC: UK tapes are PAL. US tapes are NTSC. If your VCR and TV (or converter) aren’t speaking the same video language, you’ll often get black and white.
Fix: Use a VCR that matches the tape’s format, or buy a multi-system converter that can handle both.
Wavy or Flickering Image
That ripple effect usually means signal interference or poor cables.
Cheap converters and low-quality RCA cables are often to blame.
Fix: Try to buy some better-shielded cables (usually a little more expensive), or plug the converter into a different power source (some USB power sources are unstable). Also check that the VCR is on a flat surface and not near other electronics.
Rolling Picture or No Sync
If the picture keeps jumping or refuses to stabilise:
Your TV might not be happy with the signal refresh rate, Or, your converter isn’t handling interlaced video properly (most VHS is 480i or 576i).
Fix: Try a different converter - some handle interlaced signals better than others.
Audio but No Video (or Vice Versa)
This is usually a cable issue.
Double-check the yellow cable is firmly in place - that’s the video feed.
If you're getting video but no sound, check the red and white cables.
Fix: Swap out the cables for a different set. It’s not uncommon for cheap RCA cables to fail on one channel.
Tracking Lines or Distortion
Classic horizontal noise lines across the screen?
That’s the tape tracking. Older or worn tapes tend to wobble or ‘ghost’.
Fix: Use the VCR’s tracking adjustment (usually manual buttons or an auto-tracking setting). Some TVs also have a “video noise reduction” feature that helps smooth things out. However, most consumer-level VCRs can’t do a great job at this, so..
Better Fix: Send your tapes for digital conversion with us - as we have the very best, professional grade VCRs which do a far better job of tracking for old and worn tapes.
Tapes Play for a Few Seconds, Then Stop
Some VCRs will auto-stop if they think the tape is blank or damaged.
Fix: Try fast-forwarding and rewinding the tape before playback. Sometimes this loosens things up.
If that fails, it might be a mouldy or stretched tape - don’t keep pushing it or you’ll risk a jam. Instead, send the tape to us and our experienced technicians will usually be able to rescue the tape and convert it to a modern format for you to watch in a much more convenient manner!
If the picture is consistently rough no matter what you do, your VCR might be the problem. In that case, you’ve got two options: find a replacement, or skip playback altogether and send your tapes straight for conversion. More on that shortly.
Can I Use a DVD Recorder or Digital Converter Instead?
Technically, yes - you can convert your own tapes at home. But unless you’ve got the right gear, the right software, and hours of spare time, the results are often disappointing. Worse, if your tape is damaged, dirty, or degrading, you could do more harm than good.
Here’s how the DIY options stack up - and where they fall short.
Using a DVD Recorder: If You Can Find One That Works
You’ll need a working DVD recorder (rare these days), a pile of blank discs, and a VCR with compatible outputs. Then you’re stuck watching your tapes in real time as they burn to disc - hoping the recorder doesn’t crash halfway through.
Common issues:
Most recorders reject cheap blank discs
Playback quality depends entirely on your hardware
You end up with DVDs - not digital files
Entire process is slow and outdated
Using a USB Capture Device: In Theory, a Decent Idea
These little gadgets plug into your PC and capture video through RCA or SCART. They’re cheap, but so is the image quality. Expect dropped frames, washed-out colours, and awkward software that often hasn’t been updated since Windows XP.
You’ll need:
A functioning, high quality VHS player
Capture software that doesn’t glitch
Lots of storage space
Lots of patience
Common problems:
Audio sync issues
Poor frame rate conversion
Software crashes mid-transfer
Real-time recording: two-hour tape = two-hour wait
Why a Professional Service Is a Safer Bet
A proper VHS conversion company such as ourselves, doesn't rely on consumer-grade gadgets and guesswork. We use industrial playback decks with built-in stabilisation and professional time base correctors (TBCs) that clean up the footage as it’s transferred.
What you get instead:
Significantly sharper and more stable picture
Frame-perfect audio sync
Tapes inspected and cleaned before transfer
Multiple delivery options: Convert your VHS to DVD, USB stick, or downloadable files
No setup, no software, no stress
And crucially, your tapes are safe. No chewed reels, no corrupted discs, no late-night tech support threads.
If the footage matters, don’t risk it. A conversion service may cost a little more upfront, but the time, quality, and peace of mind you get in return make it a far better investment.
Alternatives If Your VCR Is Dead or Missing
No VCR? No problem - though you’ll need to get hold of one before anything else happens. VHS players aren’t made anymore, but they’re still out there if you know where to look.
Where to Buy a Working VHS Player
1. eBay
Still the easiest source. Search for “tested” or “working” models and stick to sellers with strong feedback. Avoid listings marked “untested” - that’s code for “probably broken.”
2. Charity Shops or Car Boot Sales
If you’re lucky, you might stumble on a bargain. Just be prepared to gamble on condition - and plug it in before you buy, if possible.
3. Vintage AV Specialists
Shops that deal in retro hi-fi and video gear often sell refurbished VHS players with a short warranty. Prices will be higher, but you’ll get peace of mind.
4. Facebook Marketplace or Gumtree
Plenty of people are still clearing out lofts. Look for local pickups so you can test before handing over cash.
What to Avoid
VHS/DVD combo units: These seem like a two-in-one win, but many are faulty. The VHS side often fails first.
Unknown brands or knockoffs: Stick to Panasonic, JVC, Sony, or Sharp.
Anything that says "powers on but not tested": It’s tested. It’s broken.
Signs of a Faulty VCR
Ejects the tape instantly
Chews tapes or makes a high-pitched squeal
Won’t play properly (stutters, freezes, distorted picture)
Blank screen even with known good tapes
If it does any of the above, don’t risk it - especially not with rare family footage. It’s far easier (and often cheaper) to replace the machine than repair it.
Connecting Is Easy - But Long-Term Playback Isn’t
Getting your VHS player connected to a TV isn’t hard. Whether you’ve got a 90s CRT with SCART sockets or a brand-new 4K flatscreen with nothing but HDMI, there’s a fix. Most setups take under ten minutes if you’ve got the right cables or converter box.
But here’s the catch: VHS tapes degrade. So do the players. The more you use them, the greater the risk of dropouts, glitches, or total failure.
If you’re just after a one-time watch, go ahead and plug in. But if the tapes matter - weddings, childhood birthdays, your uncle doing karaoke in 1994 - you’re better off getting them transferred to something modern.
If you want quality without the faff, send them to us, and for less than the cost of the cables and converters or adapters, you’ll get digital files that’ll play anywhere, anytime - no adapters needed.
Bottom line: connecting a VHS to a TV is the quick fix, and comes with its own unique nostalgic buzz (although this tends to wear off fast!). Digitising your tapes is the long-term one. Decide what suits you best, and press play.