Get 20% off orders over £50 with discount code REWIND
 01423 319041

What do you want to convert?
Back to Blogs
How to Connect AV Wires to a Modern TV
Sean Parle • 9 July 2026
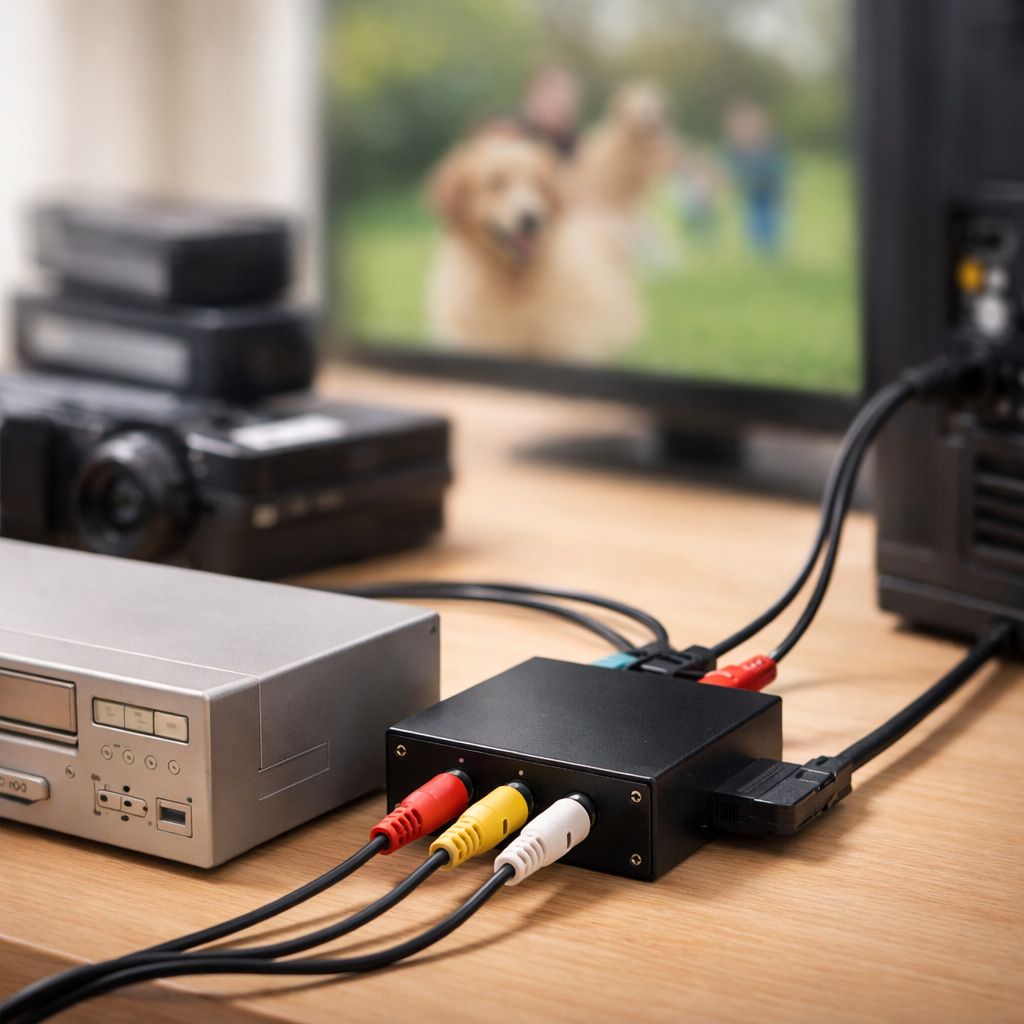
If your TV has the right AV sockets, simply plug the yellow lead into video, the red and white leads into audio, then switch the TV to the matching input.
If your smart TV has no AV ports, you’ll need to use an AV to HDMI converter box to connect the old device to the converter, then run HDMI from the converter to the TV and select that HDMI input. Composite AV is an older analogue signal, while HDMI is digital, which is why modern sets often need extra hardware in the middle.
Key points
Match the AV plugs by colour: yellow for picture, white for left audio, and red for right audio.
If your TV has built-in AV inputs, plug the cable in directly and switch the TV to AV, Video or Composite.
If your smart TV has no AV inputs, you need an AV to HDMI converter box rather than a simple cable.
Most connection problems come from the wrong input being selected, a loose cable, or an unpowered converter.
What an AV wire is
In most homes, an AV wire means the old three-plug lead with yellow, white and red connectors. Yellow carries the picture. White carries left audio. Red carries the right audio. This setup is usually called composite video with stereo audio, and it was standard on VCRs, DVD players, camcorders and older games consoles for years.
That matters because the connection method depends on the signal, not just the shape of the plug. Composite is analogue and standard definition, so it looks far softer than HDMI on a modern flat screen. That is normal - your telly isn’t broken!
Check your TV before you plug anything in
Start with the side and back of the TV. You are looking for one of three setups:
The easiest is a TV with full AV inputs already built in. These are the familiar red, white and yellow sockets. If you have those, the job is simple, just match the plugs to the sockets.
The second is a TV with a small 3.5mm AV input instead of full-size RCA sockets. Some Samsung and Sony sets use this approach, and they need a brand-specific adaptor that breaks that single socket out into red, white and yellow connectors.
The third, and now the most common, is a smart TV with HDMI inputs only. In that case, the TV cannot read a composite AV signal directly. You need an active AV to HDMI converter. In my view, this is the point where most people go wrong - they assume a cheap cable will sort it, but usually it will not.
How to connect AV wire to a TV with standard AV inputs
If your TV has the red, white and yellow sockets built in, do this.
First, turn off both the TV and the device you are connecting. It is not always essential, but it avoids confusion while you are plugging things in.
Next, connect the yellow plug to the yellow video input on the TV. Then connect the white plug to the white audio input and the red plug to the red audio input. Match the colours exactly.
Now turn on the source device. That might be a VCR, DVD player, camcorder or old games console. Then turn on the TV.
Finally, press Source or Input on the remote and select the right input. Depending on the brand, it may be labelled AV, Video, Composite or EXT. If you leave the TV on live channels, Netflix, or an HDMI input, you will get a black screen and assume something is faulty when it is not.
How to connect AV wire to a TV with a 3.5mm AV adaptor
Some TVs still support composite video, but they do it through a small AV socket rather than three separate RCA inputs.
The method is straightforward.
Plug the red, white and yellow AV leads into the correct ends of the adaptor.
Then plug the adaptor into the TV’s AV input socket.
After that, turn on the source device, turn on the TV, and select the AV input from the source menu.
The catch is the adaptor itself. These are not always interchangeable. A random third-party lead that physically fits may still give you no picture, no sound, or both. That is why it is worth checking the manual for your exact TV model before buying a replacement. It is a dull step, but a lot cheaper than buying the wrong bit twice!
How to connect AV to a smart TV without AV inputs
This is the setup most people will encounter now.
If your smart TV only has HDMI sockets, you need an AV to HDMI converter box. Not a passive lead - a proper, active converter box. Composite AV is analogue. HDMI is digital. The signal has to be converted, not just rerouted.
Here is how to connect it AV to HDMI:
Plug the yellow, white and red leads from your old device into the matching AV input sockets on the converter box.
Then connect an HDMI cable from the converter’s HDMI output to an HDMI input on the smart TV.
Power the converter. Many small converter boxes need USB power or a mains adaptor before they do anything at all. If you skip this, the TV will usually show no signal.
Turn on the source device, whether that is a VHS player, camcorder, older DVD player or retro console.
Now switch the TV to the HDMI input you used for the converter. If the box is plugged into HDMI 2, the TV must be on HDMI 2.
That is the whole chain: old device to AV converter, AV converter to HDMI, HDMI into the TV. If you are connecting a VCR this way, this guide on how to connect a VHS player to a TV covers the same setup in more detail.
Why AV to HDMI cables are rubbish
This deserves its own section because people waste money on it all the time.
A cable with RCA plugs on one end and HDMI on the other looks like an easy answer, but it rarely is. The reason is basic but important: composite AV and HDMI do not speak the same signal language. One is analogue, one is digital. Unless a conversion chip sits somewhere in the chain, the TV has nothing useful to decode.
That is why active converter boxes exist. They take the old analogue picture and sound, process it, and output a digital HDMI signal the TV can read. It is less tidy than using one cable, but it is the method that actually works. The same idea applies if you are trying to connect SCART to a smart TV.
How to choose the right AV to HDMI converter
Do not overthink this, but do check the basics.
Make sure the box accepts composite RCA input. That means yellow for video and red and white for audio.
Make sure it outputs HDMI.
Check whether it supports PAL as well as NTSC. In the UK, PAL support matters, especially with older tape-based kit. A converter with a PAL/NTSC switch is often the safer buy.
Also check how it is powered. Some take USB power. Some come with a mains plug. Some need you to supply one. A converter with no power is just a small plastic disappointment.
Personally, I would pay a little more for a box with clear labelling and decent reviews rather than going for the absolute cheapest option. These things are not glamorous, but a flaky converter can make a perfectly healthy VCR look dead. If your goal is to save old recordings rather than just play them back once, it may be worth looking at how to transfer VHS to a computer instead.
The best available are the Framemeister and Retrotink devices - but they might be overkill for some people, as they upscale resolutions too, which not everyone cares about. A simple amazon device should suffice for most people - just pay attention to the reviews.
How to connect common older devices
The same logic applies to most old equipment.
With a VCR, connect the VCR’s AV output to the TV directly if AV ports are available, or through an AV to HDMI converter if they are not. Insert the tape, press play, and select the right TV input. If you are still hunting for a machine, this guide on where to buy a VHS player is useful.
With a camcorder, connect the camcorder’s AV out lead or dock to the TV or converter, then switch the camcorder to playback mode. A lot of people forget that last part and stare at a blank screen. If your tapes are from smaller camcorders, it also helps to know the different types of videotapes through the years, especially if you are dealing with VHS-C or Video8.
With an older DVD player, plug in the composite leads, power the player, insert the disc, and select the correct source.
With a retro games console such as a SNES, MegaDrive or even an old personal computer such as an Amiga, the process is the same, though the picture may look rougher than you remember. Nostalgia can be generous and flat screens are less kind to big pixels!
How to fix the most common problems
If you get sound but no picture, check the yellow lead first. It may be loose, plugged into the wrong socket, or connected to the wrong adaptor.
If you get picture but no sound, check the red and white leads. One loose audio plug is enough to make the setup seem half-dead.
If the TV says no signal, check the source selection on the TV and the power to the converter box. On a smart TV, the wrong HDMI input is a very common mistake.
If the picture is black and white, the signal standard may be wrong. Some converters have a PAL/NTSC switch for this.
If nothing works at all, go back to basics. Check that the device itself is actually outputting a signal. Press play on the VCR. Put the camcorder in playback mode. Try another HDMI socket on the TV. Try another AV cable if you have one. Most connection problems are boring, not dramatic.
What picture quality to expect
Be realistic here. Composite AV was built for standard-definition television, not a huge modern 4K panel.
So yes, the image can look soft, noisy or slightly smeared on a smart TV. That is normal. In my view, it is still worth it if the goal is to watch old home videos, check family tapes, or get an old machine running again. Perfect sharpness is not really the point. Seeing the footage at all is. If that pushes you to preserve the recordings properly, this piece on why you should convert VHS tapes to digital is a sensible next read.
Why it is often better to convert old media to digital instead
Connecting AV to a TV is fine if you just want to check a tape, watch an old recording, or see whether a machine still works. But if you plan to keep those memories, it is usually better to have the footage converted to digital instead - which we’re happy to do for you! If you’ve got tapes, try our VHS to DVD or VHS to USB services. If you’ve got old Camcorder tapes, check out the Camcorder to digital conversion page.
The biggest reason is reliability. Old tapes do not improve with age. VHS, VHS-C, Video8, Hi8 and MiniDV can all lose quality over time, and playback equipment is getting harder to find in good working order. A tape you can still watch today might not look as clean in a few years, and the player itself may fail before the tape does.
There is also the issue of convenience. Watching tapes through AV leads, adaptors and converter boxes works, but it is not exactly smooth. You need the right cables, the right input, a working machine, and often a converter just to get a picture on screen. A digital file is far easier to live with. You can store it on a computer, back it up, copy it for family, and play it on modern devices without dragging out old hardware every time.
Picture quality is another factor. AV playback on a smart TV can look soft and noisy because you are stretching an old standard-definition analogue signal across a large modern screen. That does not make the footage worthless, but it does mean the viewing experience can be rougher than people expect. A proper transfer will not magically turn VHS into HD, but it does give you a more stable, usable format.
There is a practical point too. Every time you play an old tape, you are relying on ageing mechanical equipment. That includes spinning heads, belts, rollers and tape paths that wear out, stick, or chew up cassettes. In my view, that is reason enough not to use playback as your long-term plan if the footage actually matters to you.
So if the goal is simply to confirm what is on a tape, connecting AV to a TV is perfectly reasonable. If the goal is to keep family videos safe and easy to watch, digital conversion is usually the smarter route.
Final thoughts
The basic method is simple. If your TV has AV inputs, match yellow to video and red and white to audio, then switch the TV to AV or Composite. If your smart TV has no AV inputs, connect the old device to an AV to HDMI converter, connect that converter to the TV with HDMI, power the converter, then switch the TV to the correct HDMI source.
Most failed setups come down to three things: the wrong input selected on the TV, the wrong adaptor, or no active converter between analogue AV and digital HDMI. Get those right, and connecting AV to a modern TV is usually far less painful than it first looks.