Get 20% off orders over £50 with discount code REWIND
 01423 319041

What do you want to convert?
Back to Blogs
How To Fix VHS Tapes
Sean Parle • 15 October 2026
How to Fix VHS Tapes
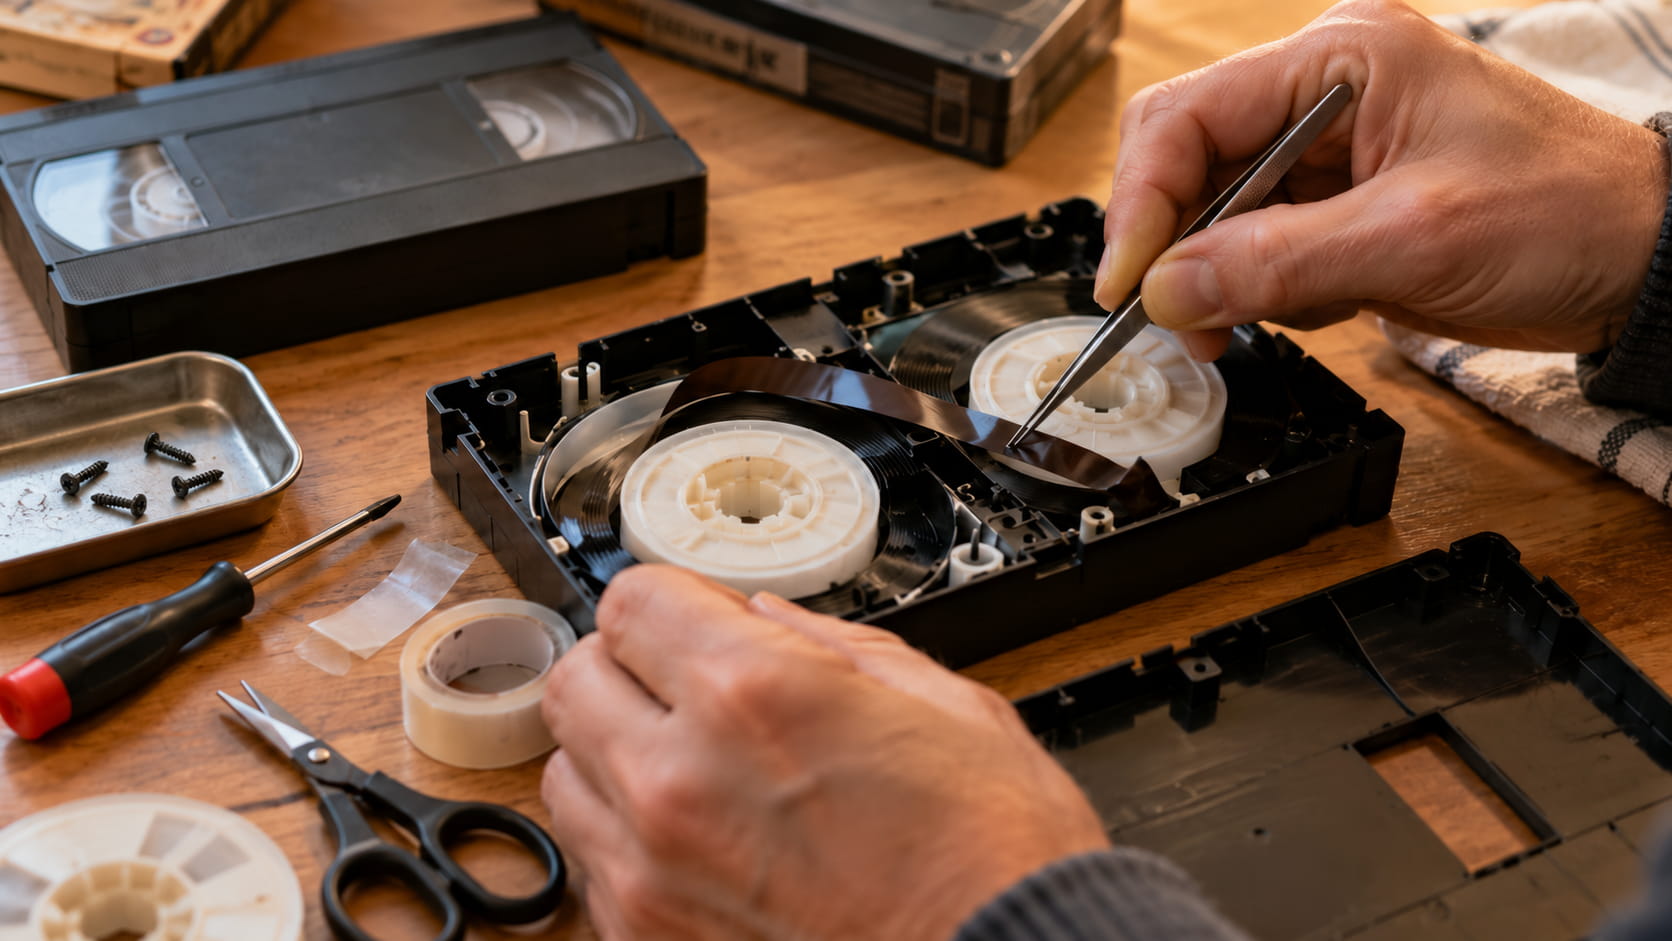
You can fix most VHS tapes at home. Snapped tape, crinkled tape, tape chewed up by a VCR and a cracked cassette shell can all be sorted with a small Phillips screwdriver, proper splicing tape and a steady pair of hands. Mould and sticky, flaking tape are a different matter, and those jobs are best handed to a professional. Whatever you fix, get it copied as soon as it plays again, because a repaired tape is still an old tape.
Key points
Snapped tape, crinkled tape, tape chewed by a VCR and broken cassette shells can all be fixed at home with a Phillips screwdriver, proper splicing tape and patience.
Always splice on the dull back side of the tape, never the shiny recording side, or the VCR's spinning heads can be damaged.
Never put a mouldy tape in a VCR, because the mould can spread to the machine and then to every tape you play afterwards.
A repaired tape is still an old, ageing tape, so get it digitised as soon as it plays again.
What actually goes wrong with VHS tapes
VHS tapes are older than a lot of people realise. JVC unveiled the first VHS recorder, the HR-3300, in Tokyo on 9 September 1976, and the UK got its version, the HR-3300EK, in 1978. That means the oldest home recordings in British lofts are now pushing 45 years old.
Most of the damage people bring to a repair bench falls into four groups:
Snapped tape, where the tape has broken clean in two
Creased or crinkled tape, usually caused by a VCR that stopped pulling the tape smoothly
Tape chewed up and left hanging out of the cassette
A broken shell, with cracks, a stuck flap or a missing spring
Then there are the problems you can't always see. The binder that glues the magnetic particles to the tape is generally made from polyester polyurethane, and according to the Council on Library and Information Resources (CLIR), these polymers break down through hydrolysis, a reaction with water in the air. CLIR's research also found that humidity matters more than temperature for how long a VHS tape lasts. The result can be a tape that turns sticky, sheds its coating or simply won't play.
The CLIR guide to magnetic tape storage, which archives and libraries still rely on, gives magnetic media a practical lifespan of 10 to 30 years. Do the maths on a tape from 1989 and it's obvious why so many are failing now.
Here's the annoying part. Most people only discover the damage when the tape is already inside the player. That is the worst possible moment, because a struggling VCR can turn a small problem into a big one in seconds.
The tools you'll need
You don't need much, but cutting corners with the wrong kit causes most botched repairs.
A small Phillips screwdriver (a precision one is best, as the screws are tiny)
Proper video splicing tape
Small, sharp scissors that you've wiped clean
Tweezers for guiding tape through tight spots
Lint-free cotton gloves, because the oil on your fingers can damage the tape surface
A donor cassette, ideally a tape you don't care about, for spare parts
A torch for checking the tape pack for mould
A small bowl for the screws
A word on Sellotape. Some repairers say thin clear sticky tape will do in an emergency, and plenty of old repairs were done that way. We'd still avoid it. Proper splicing tape is thinner, made for the job and cheap online. Ordinary sticky tape is thicker and its glue can creep out at the edges, and that glue ends up on the VCR's spinning heads. Saving a few pounds isn't worth risking the footage or the machine.
How to open a VHS cassette without making things worse
A standard VHS cassette is a plastic shell 187mm wide, held together by five Phillips screws. You'll find one in each corner and one in the middle. A few tapes use four, and some cheap ones have none at all.
Lay the tape face down on a clean, flat surface and cut any label running along the spine where the two halves meet.
Remove all five screws and put them straight in your bowl.
Hold both halves together, flip the cassette back over, then lift the top half straight up.
Go slowly. Springs and small plastic parts can jump out if you rush.
Before you touch a single bit of tape, take a photo. The tape follows a set path around two shiny metal guides at the front of the cassette, and you'll need to put it back exactly the same way. If you forget, you can check a working tape: press the small button on the side of the flap, flip the flap open and look at how the tape runs, without touching it.
There are also small brakes between the two spools that stop them turning when the tape isn't in a machine. You'll need to hold these back gently whenever you lift the spools out or wind tape by hand.
Honestly, this is the step where most home repairs go wrong. Not the splicing, the opening. People lift the lid too fast, the spools tilt and the tape spills everywhere. Take your time here and the rest gets much easier.
How to fix a snapped VHS tape
A clean snap is the easiest repair on this list. You'll lose a few seconds of footage at the break, but the rest of the tape should play fine.
Trim both broken ends so they're straight and clean. Cut away any stretched, curled or frayed tape, as a ragged end will never splice properly.
Line the two ends up so they meet without overlapping. Many repairers trim both ends at a 45-degree angle so they slot together, which tends to pass through the machine more smoothly than a straight join.
Put a small piece of splicing tape across the join on the back of the tape, the duller side that faces inwards on the spool. Never on the shiny recording side that touches the heads.
Trim any splicing tape hanging over the edges. Even a sliver sticking out can catch in the machine.
Wind the slack back onto the spools by turning the hubs, then thread it around the guides and close the shell.
Why does the side matter so much? Any splice in the middle of a tape has to pass over the VCR's head drum, which spins at high speed. As the repairer Gough Lui points out, a messy splice can cause permanent damage to the heads. Keep the sticky side well away from the recording surface.
If the tape has snapped right at the end, where the brown tape joins the clear plastic leader, you need to reattach it to that leader rather than cut the leader off. Those clear sections at each end are how the VCR knows to stop. A light shines up through the hole in the bottom of the cassette, and when clear tape passes the sensors at either side, the machine stops winding. Lose the leader and some machines will happily wind the tape straight off the spool.
How to fix creased or crinkled tape
Crinkled tape is trickier than snapped tape, and the honest answer is that you can't always save it.
Creases happen when a VCR stops pulling the tape evenly, or when loose tape gets bent while it's hanging out of the cassette. On screen, they show up as dropouts, flashing lines and tracking problems that no amount of fiddling with the tracking button will fix.
For a light crease, you can sometimes run the tape gently between gloved fingers to flatten it, then wind it back on firmly. It may play with a brief glitch.
For badly creased tape, the kinder option is often to cut out the damaged section and splice the good ends together. That sounds drastic. But a heavily mangled section rarely gives you a watchable picture anyway, and feeding it through the machine again and again risks snapping it or clogging the heads.
Our view? Losing three seconds of a birthday party is a better deal than losing the whole tape, or the VCR you need to play it.
How to rescue a tape chewed by your VCR
If your VCR eats a tape, your first instinct will be to hit eject and pull. Don't.
Switch the machine off at the wall. This stops the motors from winding any further.
Look inside the slot with a torch and see where the tape is caught. It's usually wrapped around the rollers or the head drum.
With the machine still off, ease the loose tape off the rollers and drum with your fingers or tweezers, little by little. Never yank it.
Once the tape is free of the mechanism, power the VCR back on and eject the cassette.
Wind the loose tape back inside by turning the spool hub with a pencil or your finger. Some people find it easier to hold the flap open with the side button while they do this.
Check the tape for creases and breaks before you play it again.
Then check the VCR. Tiny scraps of tape left inside can wrap around the next cassette you put in. And if the machine chews tapes regularly, the machine is the problem, not your tapes.
How to replace a broken cassette shell
Sometimes the tape is fine and it's the plastic box that's failed. Common signs include a cracked shell, a flap that won't open or close, a rattle when you shake it, or a missing spring.
The fix is a reshell, which simply means moving both spools into a donor cassette.
Open the donor cassette, remove its spools and set them aside.
Open the broken cassette and lift both spools out together, keeping the tape between them tight.
Drop them into the donor shell, holding the brakes back as you go.
Thread the tape around the guides at the front so it matches your photo.
Close the shell, hold the halves together and replace the screws.
Don't overtighten those screws. Snug is enough. Crank them too hard and you'll crack the new shell or squeeze the spools so they can't turn freely.
How to spot mould on a VHS tape
Mould is the one problem you really need to catch before the tape goes anywhere near a machine.
Open the flap or, better still, open the shell and shine a torch across the edge of the wound tape. Mould usually shows up as white or grey spots, fine fuzzy threads, or a powdery film on the edges of the tape pack. Our technicians look for one tell-tale sign in particular: active mould is moist and smudges slightly when touched. A musty smell when you open the box is another warning sign.
Where you stored the tape matters. The British Library's Preservation Advisory Centre says mould spores generally need temperatures between 10 and 35°C, do best at 20°C and above, and thrive in relative humidity higher than 70%. Garages, sheds, damp cupboards and lofts that heat up in summer and get clammy in winter are perfect for it.
Never play a mouldy tape. Our technicians regularly see mould-affected tapes that have torn in a home VCR. Experienced restorers on the digitalFAQ forum go further, warning that a mouldy tape can foul the heads and guides and then pass the mould onto every tape you play afterwards. One bad tape can spoil a whole collection.
Can you clean mouldy VHS tapes yourself?
You'll find plenty of online videos showing how to wipe mould off a tape at home. Some people do get away with it. Plenty don't.
Cleaning mould properly means winding the tape slowly past a cleaning surface while lifting the growth off without scratching the magnetic coating. Professionals use dedicated machines for this, and many keep a separate VCR purely for dirty tapes so the mould can't spread to anything else. You probably don't have either.
There's another problem. If the mould has eaten into the recording side, the magnetic tracks underneath are usually damaged too, so our technicians expect some signal loss whatever they do. Cleaning removes the mould. It can't bring back what the mould has already destroyed.
Our honest opinion is this. If the tape is a shop-bought film you can replace for a fiver, have a go if you like, wearing gloves and a mask and working away from your other tapes. If it's your wedding, your kids' first steps or the only video of a grandparent, don't risk it.
Could your VCR be the real problem?
Before you blame the tape, look at the machine. Every VCR still in use is getting on a bit, and they wear out too.
Signs the VCR is at fault include:
Every tape you play looks snowy or blank, not just one
The picture is poor even on a tape you know is in good condition
The machine chews or crinkles more than one tape
You hear squealing, grinding or clicking
Dirty or worn video heads are the usual suspect. They're delicate, and cleaning them badly can do more harm than good.
A simple test helps. Play a tape you don't care about first. If that one looks awful too, the machine is the problem, and you've saved your precious tape from being wrecked.
Common repair mistakes that cause more damage
A surprising number of tapes that end up at repair services were damaged by the repair attempt, not the original fault.
Using thick sticky tape, or putting a splice on the recording side
Pulling a chewed tape out of a VCR that's still switched on
Playing a damaged tape over and over to "see if it's fixed"
Putting a mouldy tape in a VCR, even once
Overtightening screws and cracking the shell
Touching the recording surface with bare fingers
Then there are the home remedies. You'll see people suggest hairdryers, ovens or the freezer for sticky tape. Archives do treat badly degraded tape with a controlled process called baking, but at carefully held low temperatures of roughly 49 to 54°C in proper equipment. A hairdryer or kitchen oven is nothing like that, and getting it wrong can warp the shell or ruin the tape for good. Leave it alone.
How to stop your VHS tapes breaking again
Good storage won't stop a tape ageing, but it slows things down a lot.
Keep tapes indoors, in a room that stays cool and dry all year round
Stay away from lofts, garages, sheds, cellars and outside walls
Store them upright, like books, rather than in flat stacks
Keep them in their cases to keep dust out
Keep them away from speakers, TVs and anything else with magnets
Don't leave them half-wound in the middle of a recording
For long-term storage, the Library of Congress recommends a steady 8 to 10°C and relative humidity of 20 to 30% for magnetic tape, and warns against going much colder because it can separate the lubricant from the binder. Most homes can't hit those numbers, and that's fine. Aim for a spare bedroom wardrobe rather than the garage, and keep the conditions as stable as you can.
Even perfect storage only buys you time. Every VHS tape is slowly losing its magnetic signal and its binder is slowly breaking down, whether you play it or not.
Why fixing a VHS tape is only a short-term solution
A repaired tape plays again. That's the good news. The bad news is that the splice is now a weak spot, the tape is as old as it was yesterday, and every play wears the coating a little more.
That's why the smartest thing you can do after a repair is get the footage off the tape. Once it's digitised, the original can go back in its box and you never need to risk playing it again.
If you don't fancy doing any of this yourself, Digital Converters can do it for you. We repair snapped tapes, clean mouldy tapes and re-shell broken cassettes, then convert them to digital. We also handle NTSC and SECAM tapes, so recordings from abroad aren't a problem.
We transfer VHS at its original standard definition, because upscaling an SD tape doesn't add any real detail. We also don't use AI upscaling. In our view it isn't good enough yet, and it makes too many mistakes, inventing faces and details that were never on the tape. With family footage, what was actually recorded is the whole point.
Our advice is simple. Fix it once, copy it straight away, then put the original away for good.